Confirm with blazorly --version. Full flags live on the install page.
2. Start the UI
blazorly
A browser tab opens on port 5080. The first run writes ~/.blazorly/settings.json. The URL includes a console token unless you passed --token.
3. Configure a provider
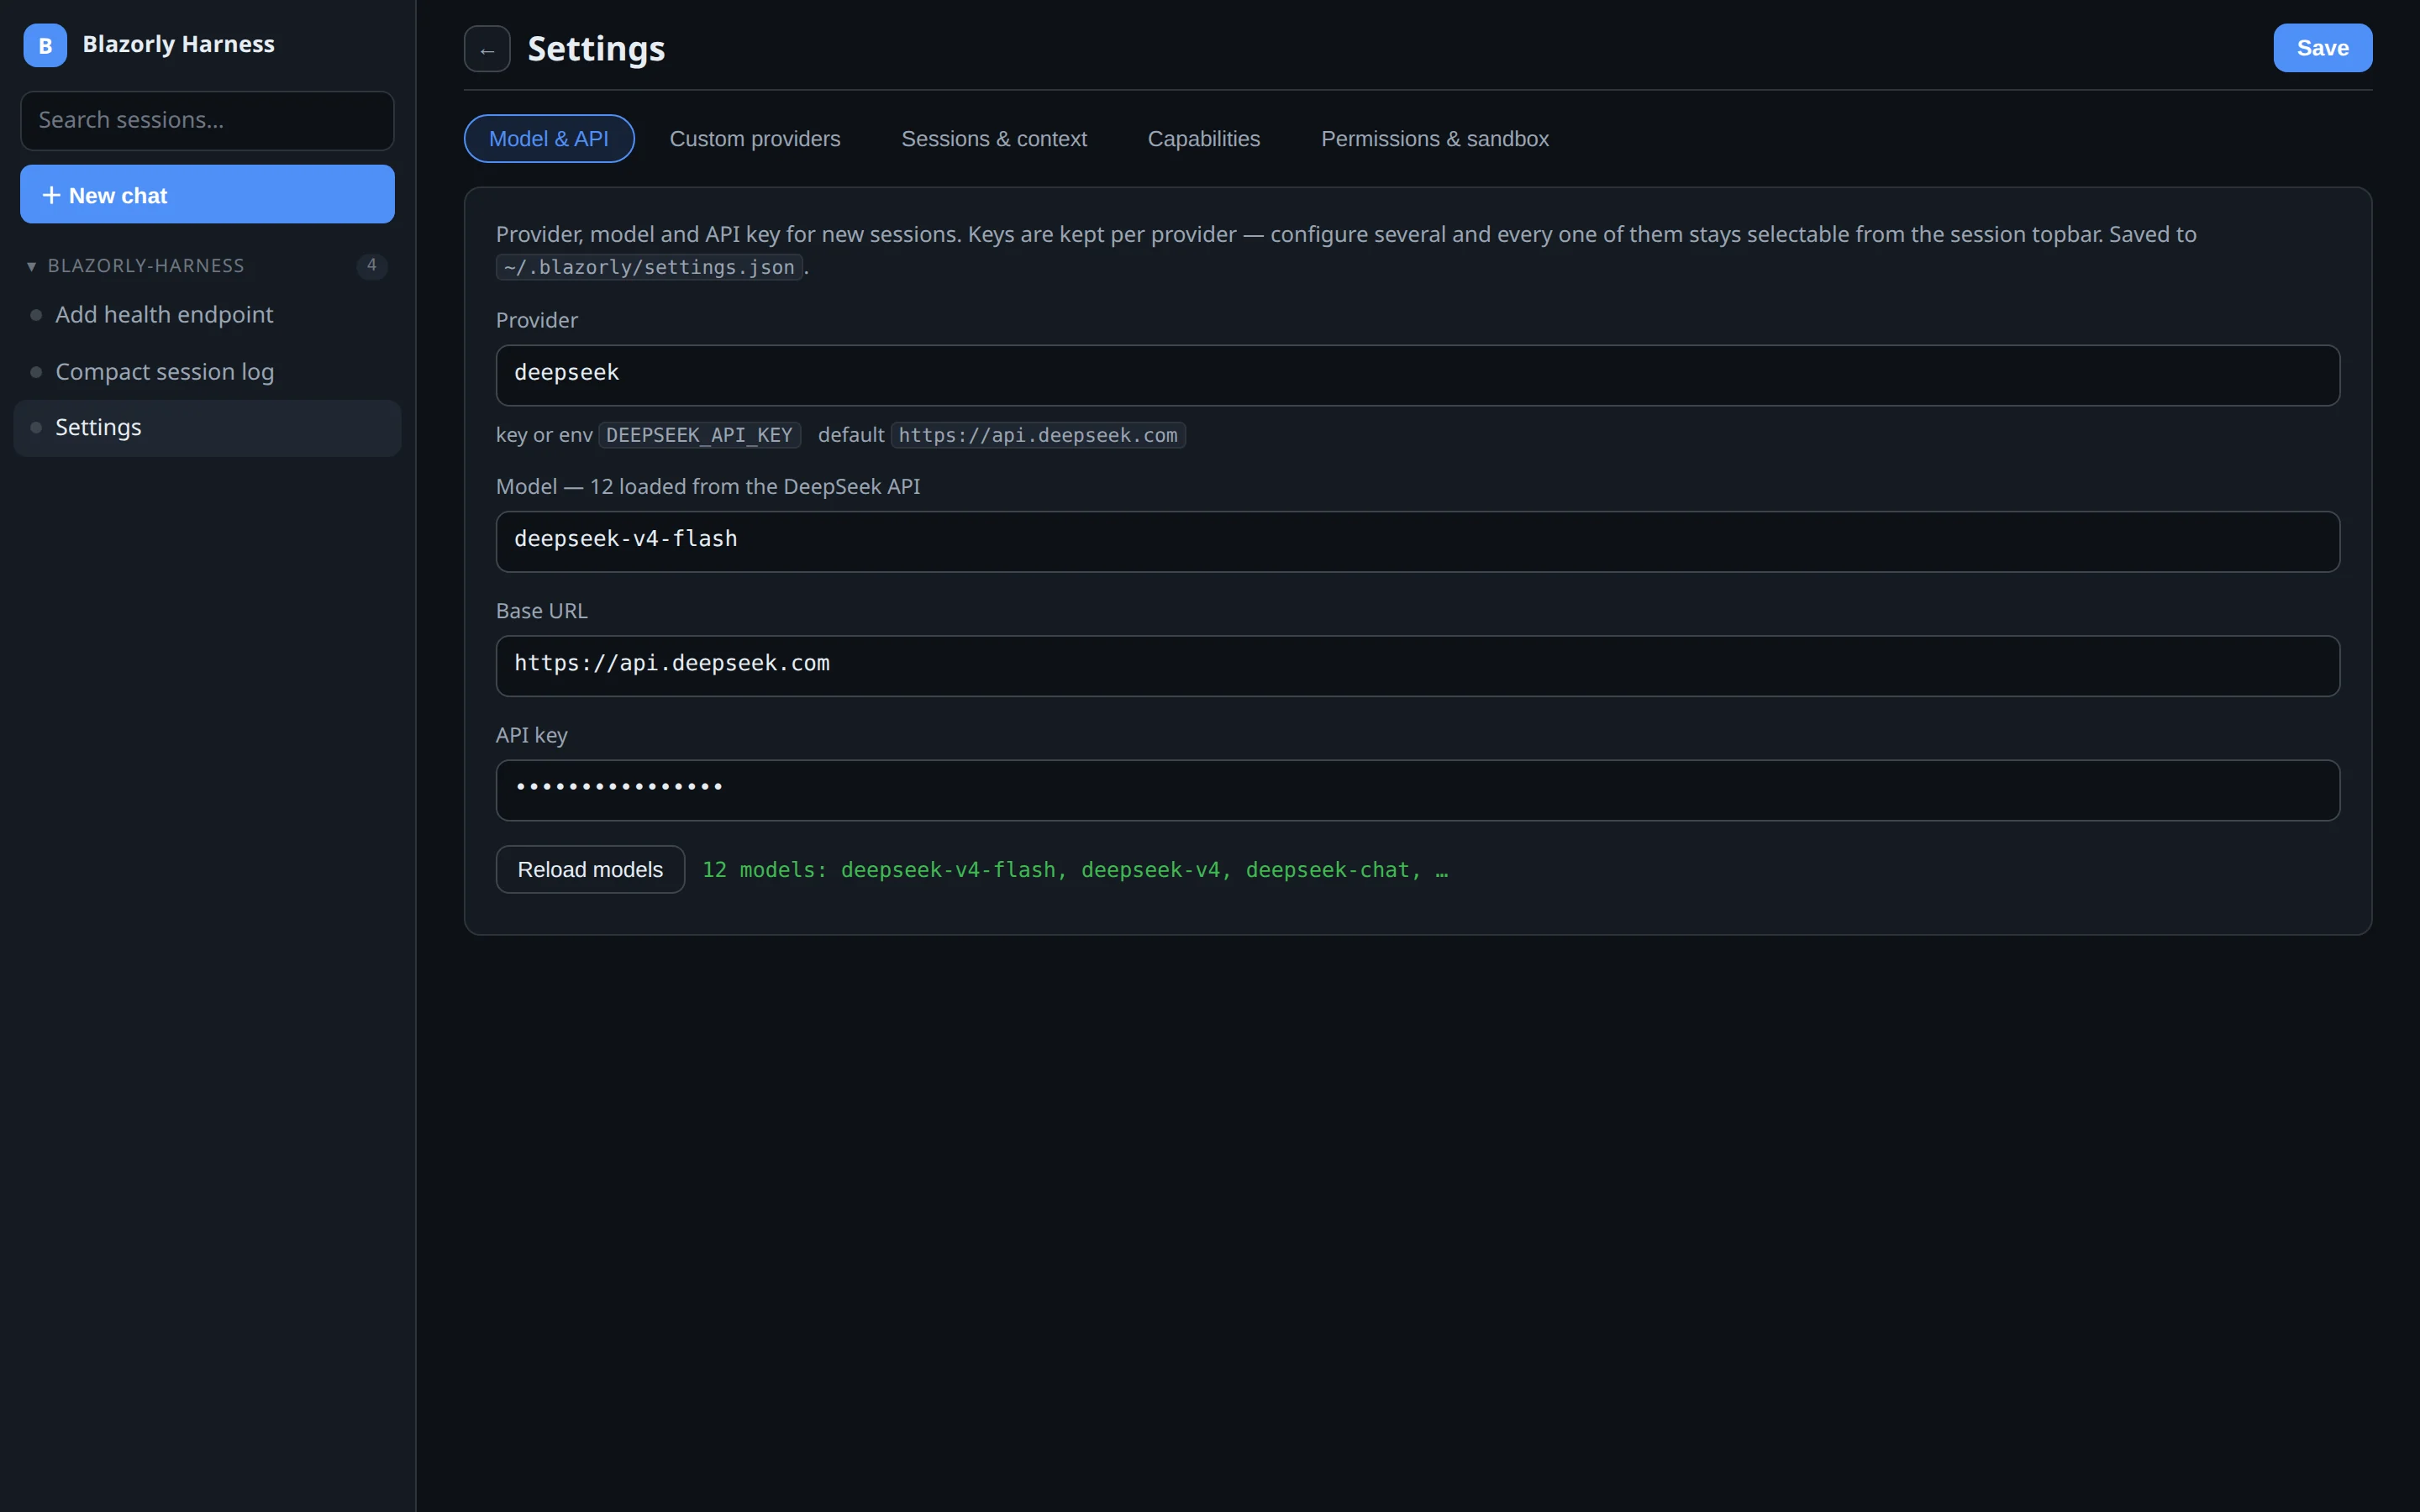
Open Settings in the sidebar. The first tab is Model & API: pick a provider, paste a key, click “Load models from the API”, pick a model, Save. Keys stay per provider. The other four tabs (custom providers, sessions & context, capabilities, permissions) are covered in Settings tabs.
Settings → Model & API. This is the whole first-run configuration for most people.
Local models: set the provider to Ollama or LM Studio and leave the cloud keys empty. Blazorly will not send a DeepSeek key to an OpenAI route.
4. Open a workspace
In the sidebar, start a new chat in the folder you care about. Empty folders are marked — the agent has nothing to read until you put files there. For a one-shot from the terminal:
cd /path/to/repo
blazorly run "summarize this repo"
5. Ask for a change you can verify
Good first briefs are small and checkable: add a health endpoint, rename a symbol, write a missing test. You are on the Chat tab. The other tab, Trajectory, is the same turn as a timeline of tools — useful once something has run. Header chips switch model and permission without going back to Settings. Details in session views.
If the model heads the wrong way, hit Stop. Partial text stays; the next message continues from a truthful log. That behaviour is documented in durable sessions.
6. Tighten the sandbox once you trust the loop
Default is full-access. For a repo you do not want the agent roaming around in, switch to workspace-write with /permission workspace-write. Read-only is there for “explain this tree, do not touch it.” See permissions.
If something is quiet
No models in the dropdown — the key is missing or the provider route is wrong. Check Settings and the env var.
UI will not open — another process on 5080, or you bound --host away from localhost.
Headless exits 2 — the turn errored or blocked. Exit 3 is a cancel or timeout, not a crash.
Linux writes fail closed under a confining preset — the Landlock helper needs cc/gcc once; without it, mutating commands refuse rather than run unsandboxed.